Preface
The NAS we use is more like a home server in our life which is capable of performing many things we want. Normally, we can access NAS very easily in your home using LAN, but when we are out, this matter becomes complicated. Many carriers do not assign public IPs to our home networks, and although we can use QNAP myqnapcloud to connect, the speed and stability are not guaranteed.
When we use cellular outdoors and need to access files or services in the NAS, it becomes a tricky problem. Therefore it is necessary to establish an intranet penetration service to access the NAS.
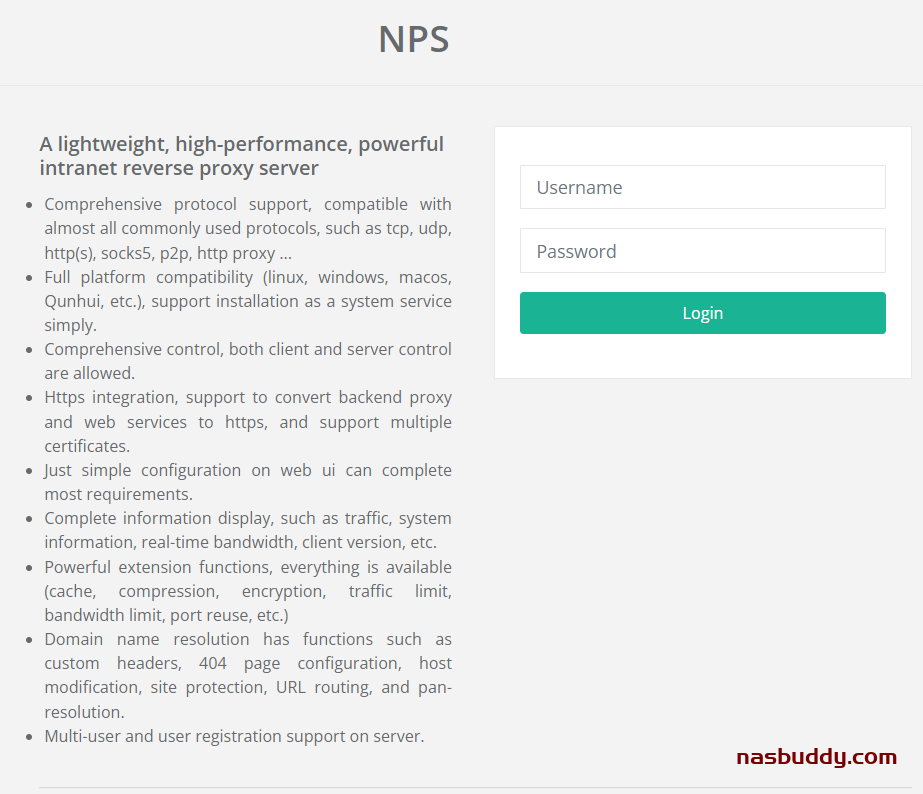
NPS is a lightweight, high-performance, powerful intranet penetration proxy server, with a powerful web management terminal. Currently supports tcp, udp traffic forwarding, can support any tcp, udp upper layer protocols, in addition to supporting intranet http proxy, intranet socks5 proxy, p2p, etc.
Github: https://github.com/ehang-io/nps
Installation
NPS service side supports a wide range of systems and architectures, and for Linux, you can use following commands to install:
sudo ./nps installFor Windows, you can use cmd for this one:
nps.exe installNPS for intranet penetration requires a service side and a client (installed in the NAS), so you first need a server with a public IP as the service side. Here, we use the Ubuntu 20.04 for service side example.
Step 1
Install NPS service side
Use SSH to connect your linux server, then execute the following code to download the NPS and unzip it.
wget https://github.com/ehang-io/nps/releases/download/v0.26.10/linux_amd64_server.tar.gz &&tar -zxvf linux_amd64_server.tar.gzNext, execute following code to install NPS:
./nps installStart NPS service:
nps startUse a browser to access server IP:8080 to open the web management interface.
Default username: admin, password: 123
Step 2
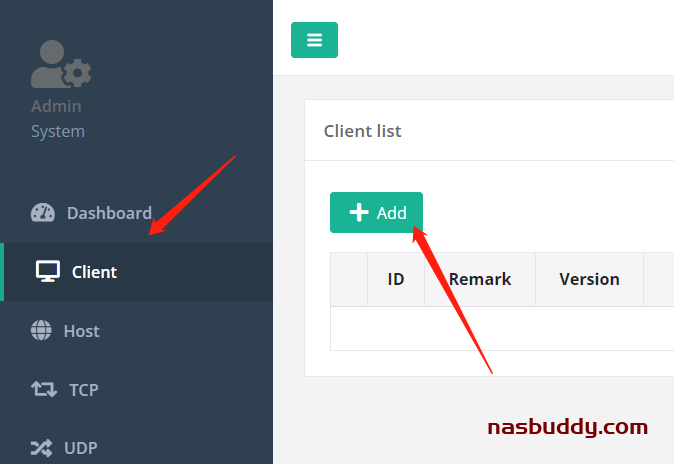
Install client
After logging in the management interface, create a new client to get the Unique verify Key.

Step 3
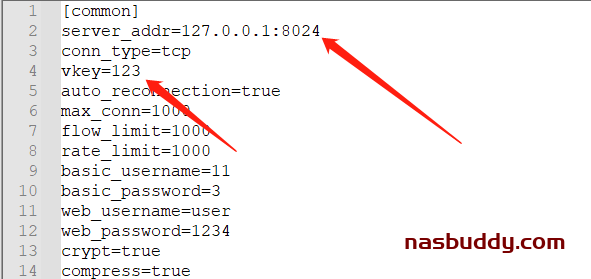
Download configuration file
Go to https://github.com/ehang-io/nps/tree/master/conf and download npc.conf. Change server_addr to your server side address and vkey to your Unique verify Key. Then create a folder in your NAS and uplad it.
Step 4
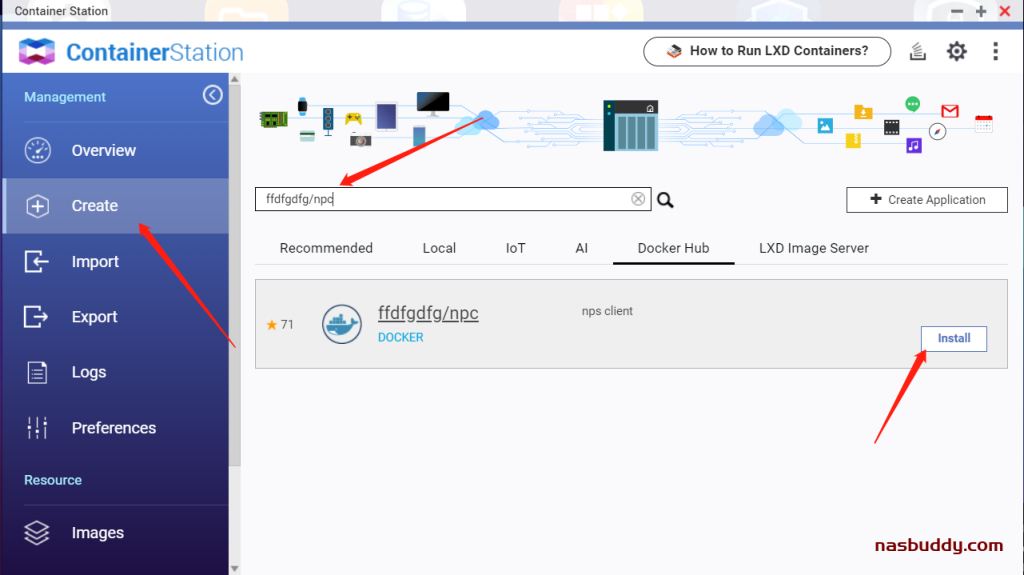
Configuring docker image
Once the server side is configured, log into the QNAP NAS and use Container Station to configure the Docker version of the client. Search and install ffdfgdfg/npc image.
Note: Click Here to learn how to install Docker container in QNAP NAS.
Step 5
Change image settings
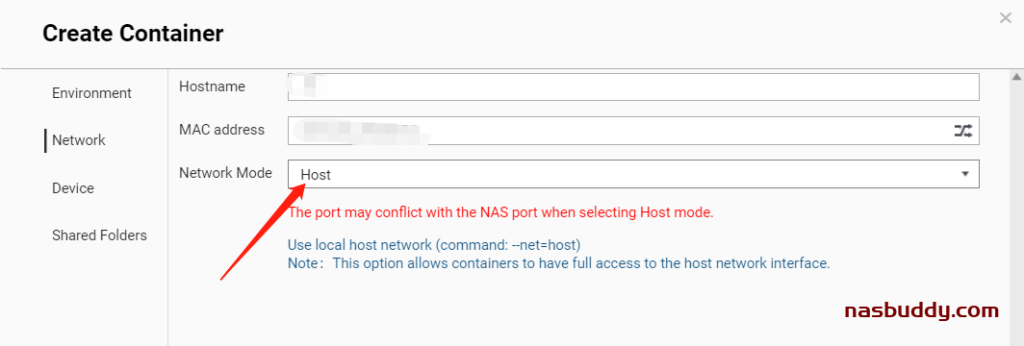
Change network mode into Host in Create Container => Advanced Settings.
Set shared folders for nps configuration files. The Volume from host is the folder of npc.conf. And Mount Point should be /conf.

Finally, click creat to run Docker image. If everything goes well, the client status will change into online in server side.
Step 6
Add TCP tunnel
In TCP settings, set Client ID to the ID of the NAS in the client list, then set Server Port to the port you want, and the Target Port to the NAS access port.
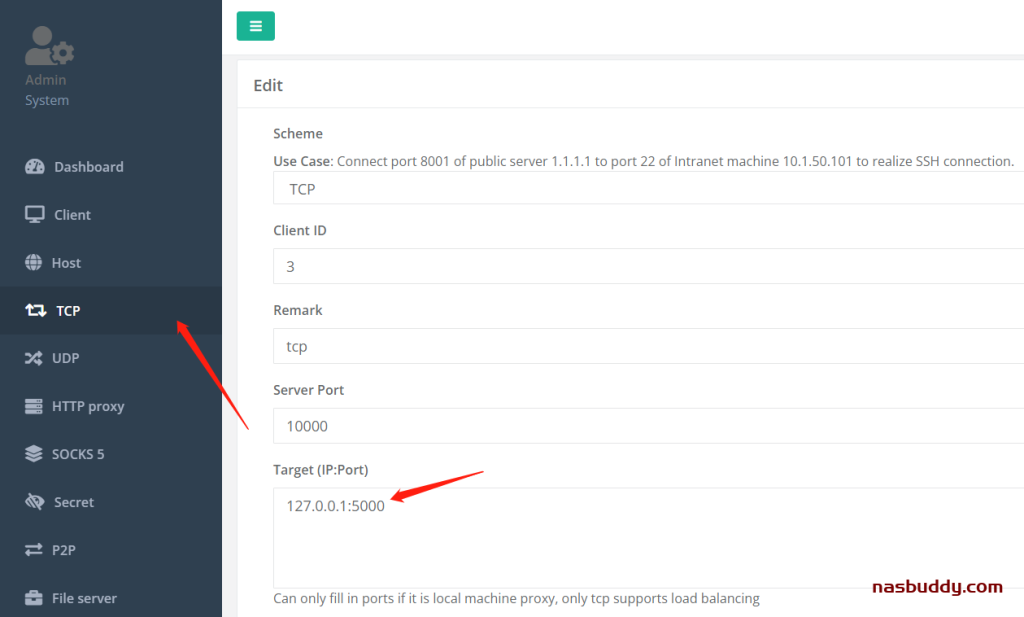
Finally, you can access the server IP:port to link NAS from anywhere.
With NPS, you can easily access your NAS devices at home from the remote location. And because NPS supports multiple clients, you can also map more home LAN devices or other devices to the server for integrated access, which is very convenient.